Putting the Windows Credential Manager To Work for PowerShell Security
Storing passwords in PowerShell scripts with elevated permissions is a security risk. Discover how to securely provide credentials to these scripts using the Windows Credential Manager.
May 17, 2024
PowerShell scripts often need elevated permissions to function. While this isn’t a problem for interactive scripts, as they can prompt an administrator to enter a password when needed, it becomes more challenging for automated scripts that require credentials.
In most cases, automated scripts that require elevated permissions run on secure systems. Even so, hardcoding a password into the script is a bad idea. While encrypting the password into a file is an option, such files are only marginally better than a hardcoded, clear-text password. This is because anyone with access to the file can use it for authentication without having needing to know the actual password.
For a more secure method of supplying credentials to automated PowerShell scripts, you can design the script to acquire permissions from the Windows Credential Manager.
Before demonstrating how this works, it is worth noting that I’m assuming that the PowerShell script in question is going to run on a domain-joined system. Although the Windows Credential Manager exists on standalone systems, it can sometimes be a bit quirky. For example, if a standalone system is configured without a password (no authentication at all), cached credentials in the Credential Manager often fail to grant access to mapped network drives, even if the stored credentials are correct.
Using Dedicated AD Accounts for PowerShell Scripts
The first step in the process is to open the Active Directory Users and Computers console and create an account specifically for the PowerShell script in question to obtain necessary permissions. While some organizations create a designated account that any and all PowerShell scripts can use, this practice can weaken security.
The reason for this is that using a general-purpose “PowerShell account” violates the principle of Least User Access. Least User Access dictates that an account should only have the permissions required to complete its assigned task – nothing more, nothing less. Since PowerShell scripts often perform privileged operations, creating a single account to service all scripts would essentially create a global admin account. If an attacker were to compromise a script and gain access to such an account, the consequences could be devastating for the organization.
Instead, my advice is to create separate Active Directory accounts for each PowerShell script. You can always store these accounts in a dedicated Active Directory folder to keep from cluttering your Users folder. Just make sure each account is named and described in a way that clearly indicates its purpose.
Setting up Windows Credential Manager
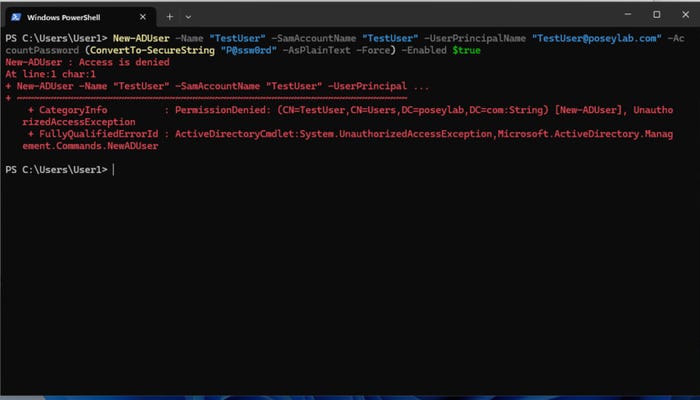
With that said, let’s look at how to use the Windows Credential Manager. For this article, I have created a standard user account called [email protected] and signed into a domain-joined system running Windows 11. I then attempted to create an Active Directory user, but as you can see in Figure 1, the process failed due to inadequate permissions.

Figure 1. The command failed due to inadequate permissions.
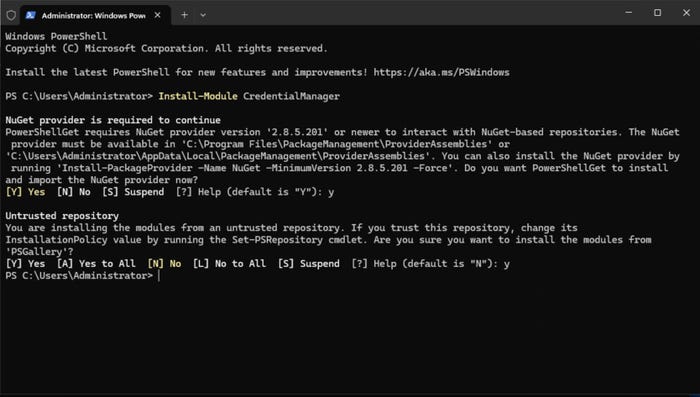
To set up PowerShell to use stored credentials, you must open an elevated session (temporarily logging in with admin permissions) and install the Credential Manager module. Use the following command to install the module:
Install-Module CredentialManager
Figure 2. I have installed the Credential Manager module.
Adding Credentials to Windows Credential Manager
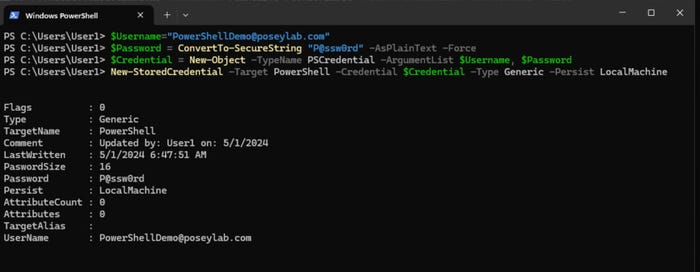
With the module installed, you can add a stored credential to the Windows Credential Manager. For demonstration purposes, I am doing this in a non-elevated PowerShell window using a standard user account. The commands that I used, which you can see in Figure 3, are as follows:
$Username = [email protected]

$Password = ConvertTo-SecureString “P@ssw0rd” -AsPlainText -Force

$Credential = New-Object -TypeName PSCredential -ArgumentList $UserName, $Password

New-StoredCredential -Target PowerShell -Credential $Credential -Type Generic -Persist LocalMachine
It is worth noting that the Target parameter used in the last command essentially assigns a friendly name to the credential. You can name the target anything you want. However, it’s important to remember the assigned target name because you will need to reference it whenever you use the stored credential.

Figure 3. The credential has been written to the Windows Credential Manager.
Retrieving the stored credential is simply a matter of using this command:
Get-StoredCredential -Target <Target Name>Creating an Active Directory User
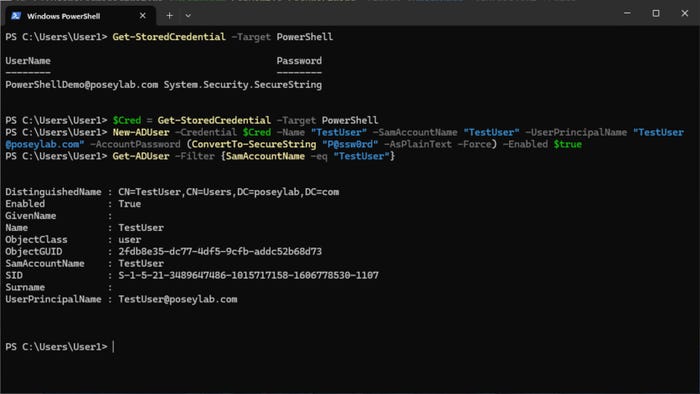
At the beginning of this article, I tried to create a new Active Directory user account from a non-elevated PowerShell session using a standard user account. That operation, of course, failed. Let’s now repeat the test using the stored credential. The only thing that I am doing differently is adding the -Credential parameter to the New-ADUser cmdlet to specify the stored credential. The commands that I used were:
$Cred = Get-StoredCredential -Target PowerShell

New-ADUser -Credential $Cred -Name “TestUser” -SamAccountName “TestUser” -UserPrincipalName [email protected] -AccountPassword (ConvertTo-SecureString “P@ssw0rd” -AsPlainText -Force) -Enabled $True
One quick note is that while a clear-text password appears in the New-ADUser command, this is the password being assigned to the new user account I am creating. It is not used to elevate my permissions so that I can create the account. The elevation of privileges is handled by the -Credential parameter.
After creating the new account, I confirmed the operation’s success using this command:
Get-ADUser -Filter {SamAccountName -eq “TestUser”}You can see the final results in Figure 4.

Figure 4. The new Active Directory account has been created.
About the Author
You May Also Like


.jpg?width=700&auto=webp&quality=80&disable=upscale)
