
This guide explains how to sign a PowerShell script. In Part One, I showed you how to deploy an enterprise certificate authority. The next step in the process is to acquire a code signing certificate from the certificate authority.
Before we can do that, however, we will need to create a code signing template.
Table of Contents
- Part 1: Deploy an Enterprise CA on Windows Server
- Part 2: Acquire a Certificate from the CA
- Part 3: Use the Certificate to Sign a PowerShell Script
To get started, log on to your Certificate Authority (CA) and open the Certificate Authority console (you can type certsrv.msc at the Run prompt). When the console opens, expand the container corresponding to your certificate authority. Now right-click on the Certificate Templates container and select the Manage command from the shortcut menu.
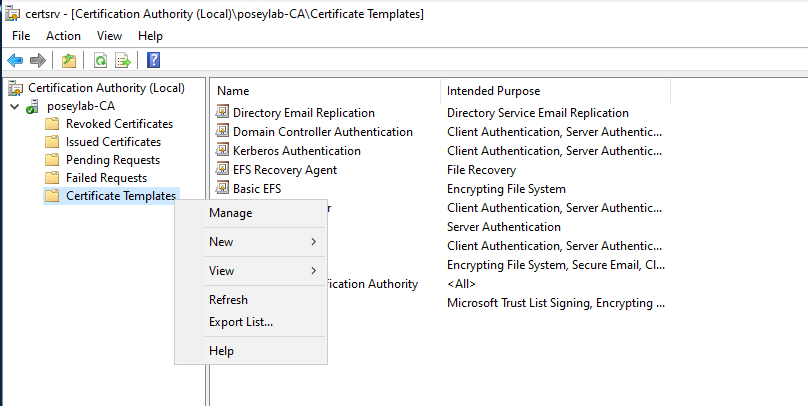
Figure 1. Right-click on the Certificate Templates folder and select the Manage command.
At this point, the console will display a long list of templates. Right-click on the Code Signing template and choose the Duplicate Template command from the shortcut menu. This will cause Windows to open the template’s Properties sheet.
Select the Properties sheet’s General tab, then give the template a new name. I am going to call my template “PowerShell.” Click the Apply button and then select the Request Handling tab. Here, you will need to ensure the Purpose dropdown is set to Signature. You will also need to select the Allow Private Key to be Exported checkbox. Click Apply when you are done.
Next, go to the Subject Name tab. Make sure that the Build From Active Directory information option is selected, then set the Subject Name Format to Common Name. See that the User Principal Name checkbox is selected and click Apply.
Now select the Security tab and assign Read and Enroll permissions to authenticated users. Click OK when you are done.
Issuing the Template
Now that we have created a signing certificate template, it’s time to issue the template. Go back to the main Certification Authority screen, right-click on the Certificate Templates container, and select the New | Certificate Templates to Issue commands from the shortcut menus.
Windows will display a dialog box that asks you to select a certificate template to enable on the CA. Select the PowerShell certificate template that you created a moment ago. Click OK.
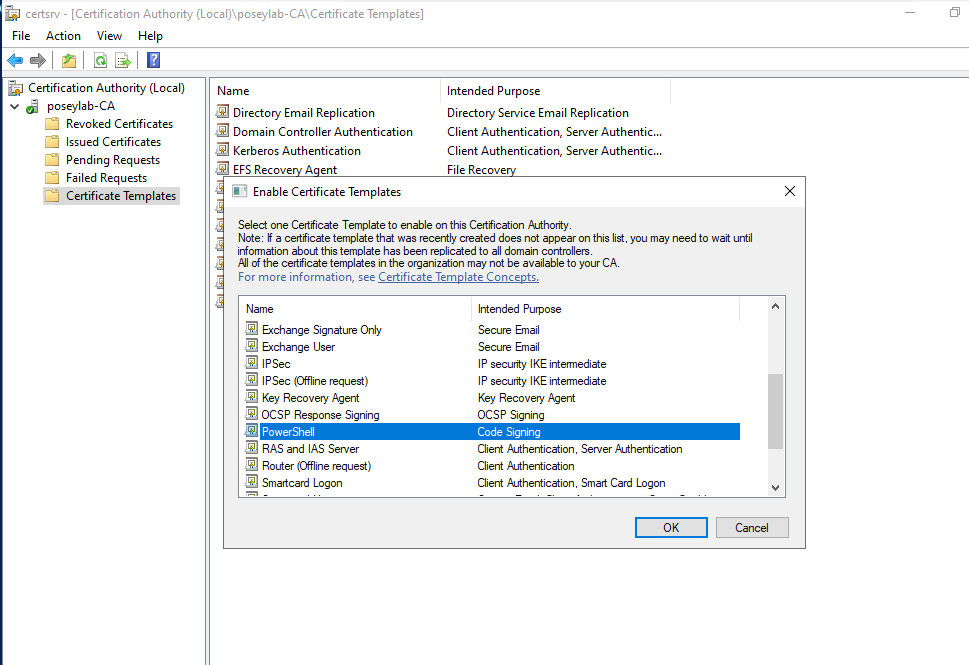
Figure 2. Select your PowerShell certificate template and click OK.
Configuring Website Bindings
As you may recall, in Part One of this guide, we chose an option that would allow web enrollment for certificates. We will use the web interface to request the code signing certificate. Before we can do that, though, we will need to configure the site’s bindings to allow SSL.
Open Server Manager on your CA, then choose the Internet Information Services (IIS) Manager from the Tools menu. When the IIS Manager opens, expand the default container, expand the Sites container, and then click on Default Web site, shown in Figure 3.
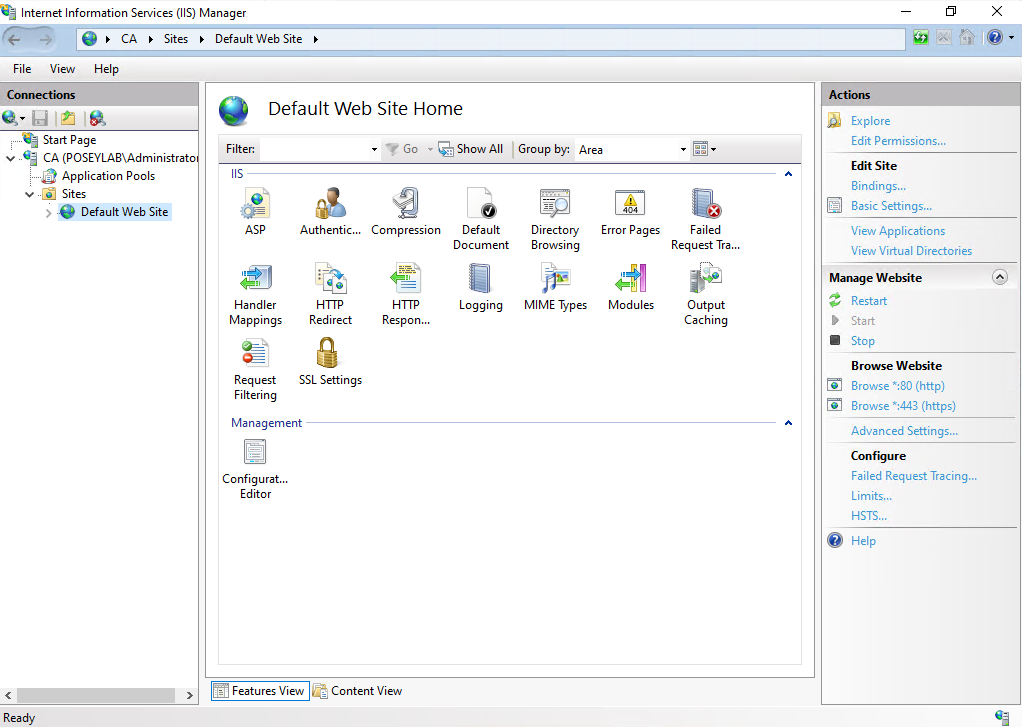
Figure 3. Click on the Default Website container.
Now click on the Bindings link, then click Add. When the Add Site Binding dialog box appears, set the Type to HTTPS and choose your CA certificate from the SSL Certificate dropdown list, as shown in Figure 4. Click OK to complete the process.
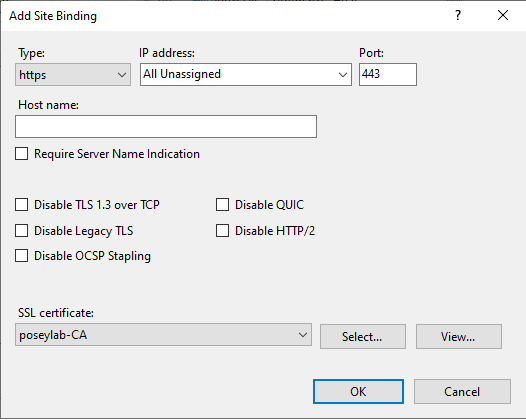
Figure 4. Set the binding type to HTTPS and choose your CA as the SSL certificate.
Requesting the Code Signing Certificate
The next thing to do is request a code signing certificate.
To do so, open a web browser on a domain-joined system. Go to https://< your CA server >/certsrv. Replace < your CA server > with either the fully qualified domain name or the IP address of your CA server. This will cause the browser to open a page hosted by the CA.
If you get an error that warns you about the site’s security certificate, you can safely ignore the error. The error occurs because the machine has not been configured to trust the CA.
When prompted, log into the site using domain credentials. From the site’s main screen, click on the Request a Certificate option, followed by the Advanced Certificate Request option. Next, click Create and Submit a Request to this CA. This will take you to the screen shown in Figure 5.
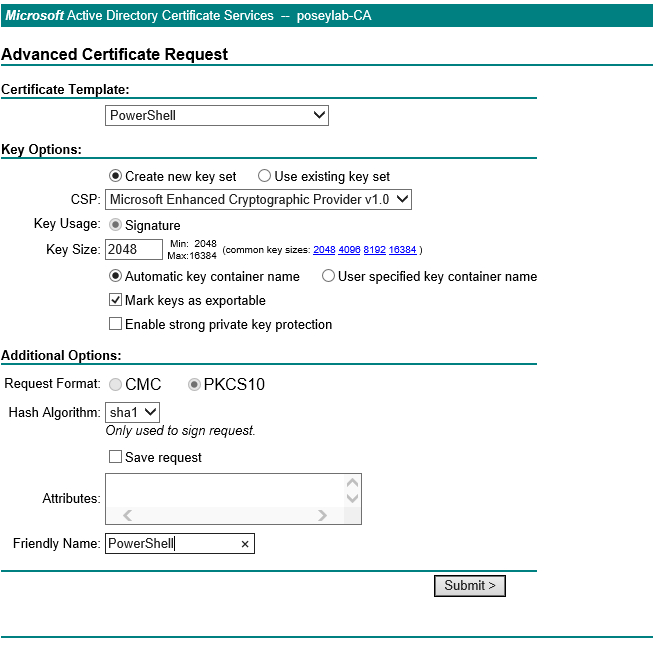
Figure 5. Choose the PowerShell certificate template and set the friendly name to PowerShell.
Choose PowerShell from the Certificate Template dropdown menu, set the certificate’s friendly name to PowerShell, and then click Submit. Upon doing so, you should get a message telling you that the certificate was issued to you. Make sure to click on the Install This Certificate link, shown in Figure 6.

Figure 6. Make sure to install the certificate.
Now that we have generated and installed the required certificate, we can finally begin to sign our PowerShell scripts. I will show you how in Part Three.


