6 Essential Steps Before Setting up NAS Appliances
Here are tips and best practices for preparing to install a network-attached storage appliance.
March 14, 2024

In a recent article, I discussed finding myself in serious need of a storage refresh. With the new hardware mostly delivered, I plan to write a series of columns detailing the storage refresh process and lessons learned along the way.
This article will focus on best practices for preparing to install a new network-attached storage (NAS) appliance.
1. Refresh Your Storage Before You Need it
The first best practice I’d like to share is to proactively refresh your storage before it becomes an urgent need. Obviously, you don’t want to wait until you run out of storage space before you install additional capacity, but there is a little more to this best practice than meets the eye.
The storage refresh that I am currently working through requires dozens of hard disks. I’m replacing three NAS appliances and upgrading storage on some standalone systems. However, I’ve encountered a problem: There seems to be a shortage of hard disks on the market right now.
Initially, I tried to purchase disks from my usual supplier, but they had less than 10 disks in stock for each model I needed. That being the case, I turned to a different supplier that claimed to have an adequate inventory. Unfortunately, it took weeks for the disks to arrive. Even as I write this, I am still waiting on about 15 more disks. The lesson here is that it’s important to allow for more time than usual due to the current scarcity of hardware.
2. Verify the Hardware
Another best practice that seems super-obvious yet is critical is to verify your hardware before diving into the installation process.
Given the hardware shortages, it’s important to confirm that you have received your order and that none of the items are missing or incorrect. The last thing you want is to encounter issues mid-installation, only to realize your vendor didn’t send the correct items or that a crucial component is missing.
3. Install Any Ancillary Hardware
Depending on the NAS hardware you’re installing, you may need to install some extra hardware into the appliances. I’m not talking about the hard drives. Those should ideally be installed later on (for reasons I’ll explain later). Oftentimes, you may need to install PCIe cards, memory, or even additional fan modules.
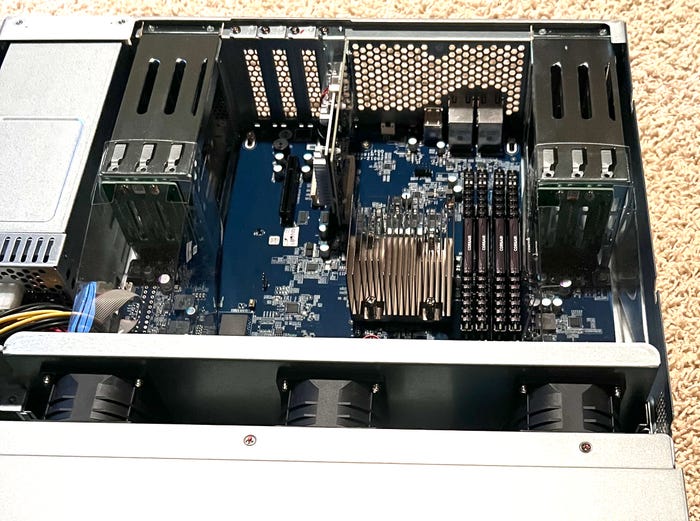
In my case, for instance, although my new NAS appliances came with 32 GB of RAM, I decided to upgrade to 128 GB. As such, I installed the additional memory before powering up the appliances for the first time.

Figure 1. I installed the memory upgrade before mounting the NAS.
4. Preliminary Testing
Considering the effort involved in installing a new NAS appliance into a rack, I recommend unboxing the appliances and doing some basic tests before mounting them. These tests don’t need to be exhaustive, although they certainly could be. Personally, I just like to verify that the NAS powers up and that I can access its administrative interface. This step is also a good time to ensure that the NAS recognizes any add-on hardware you’ve installed.
I also recommend taking the opportunity to install any available firmware updates during this initial setup phase. You won’t have to worry about doing it later on.
5. Label Everything
The next thing I recommend is labeling your NAS appliances before installation. This probably isn’t a big deal if you are only installing a single NAS appliance. However, if you are going to install more than one NAS, labeling them can make it easier to identify them.
Along with using labels to identify appliances, I also like to create labels identifying the installation year for each device on my network. That way, when I plan future hardware refreshes, there will be no doubt about which hardware components were most recently replaced.
Additionally, it’s also a good idea to write down the intended configuration for each NAS. In my case, this meant noting which network interfaces would be used (and which ones wouldn’t), as well as the IP addresses that I planned to assign to each interface.
6. Mount the Appliances Attentively
The final step in the preparation process is mounting the NAS appliances. While doing this, it’s wise to double-check that the correct cables are attached to each port and that the power supplies are connected to battery backups.
As a side note, I strongly recommend waiting to install the hard drives until after the NAS appliances have been securely bolted into the rack. An empty NAS weighs a lot less than a full one (assuming that you are using spinning disks).
About the Author
You May Also Like


.jpg?width=700&auto=webp&quality=80&disable=upscale)
