
In several recent articles, I have discussed my organization’s storage hardware refresh. With that in mind, I’d like to provide an overview of the steps involved in setting up an enterprise NAS appliance. Although each vendor has its own way of doing things, there are several high-level tasks that generally you need to complete, regardless of the vendor.
Basic Setup
When deploying a new NAS, the first step is to establish a connection to it. Many vendors offer a proprietary management tool to detect and connect to the NAS, while others may require configuration via a web browser.
Unsurprisingly, the process often starts with assigning an identity to your NAS and creating administrative credentials. You also typically need to take care of a few other really basic tasks, such as setting the device’s clock.
Creating the Storage Pool
After completing all the basic tasks, the next step typically involves creating one or more storage pools. A storage pool is simply a collection of disks that can be used for various purposes. Ultimately, you will use resources from the storage pools to create volumes.
Based on past experiences with storage appliances, many allow you to pick a RAID level during volume creation. However, some appliances bind the RAID creation process to the storage pool.
For example, in Figure 1, you can see that creating a storage pool goes beyond just choosing which disks to include. You can also designate disks to act as hot spares and set the RAID level for volumes created on top of the storage pool. Although not shown in the screen capture, this NAS also binds storage encryption and tiering settings to the storage pool.
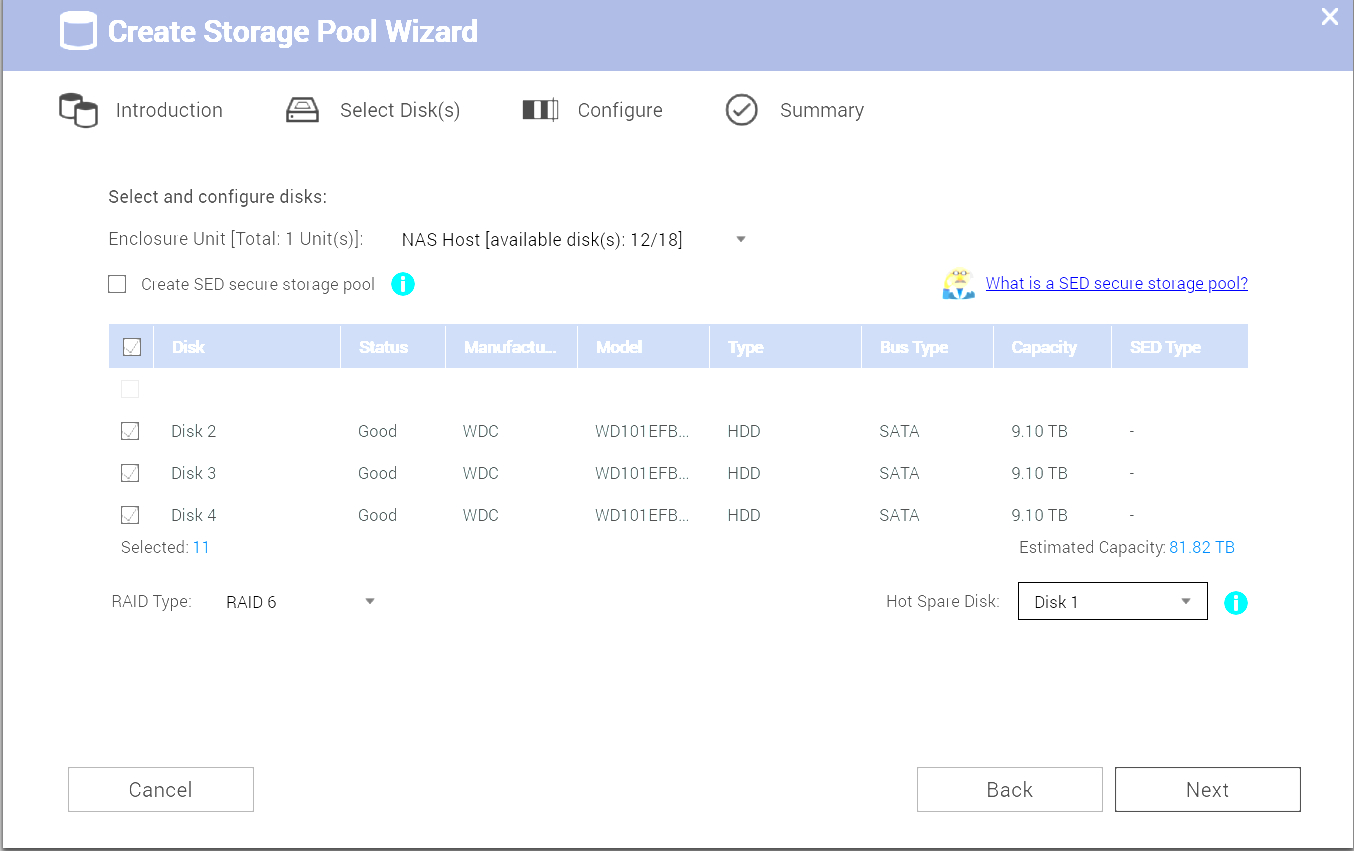
One of the first steps in preparing a NAS for use is to set up a storage pool.
Depending on the NAS vendor you use, creating a storage pool may involve additional tasks like configuring alerts, setting up over-provisioning, or establishing various threshold values.
Volume Creation
Once the storage pool has been created, the next step might involve creating one or more volumes on top of the storage pool. However, the decision to create a volume depends on your NAS vendor and your intended use of the NAS. If you are storing data directly on the NAS (e.g., using it as a file server), creating a volume is usually the right choice. On the other hand, if you plan to access the storage through a server on your network, creating a storage volume might be unnecessary. In this type of situation, you would likely opt for block storage instead (more on that in a bit).
If you do create a volume, you will need to determine its size. However, there are often several other options to consider. For instance, you might decide whether to provision the volume as thin, thick, or static. You can see an example of the volume creation process in Figure 2.
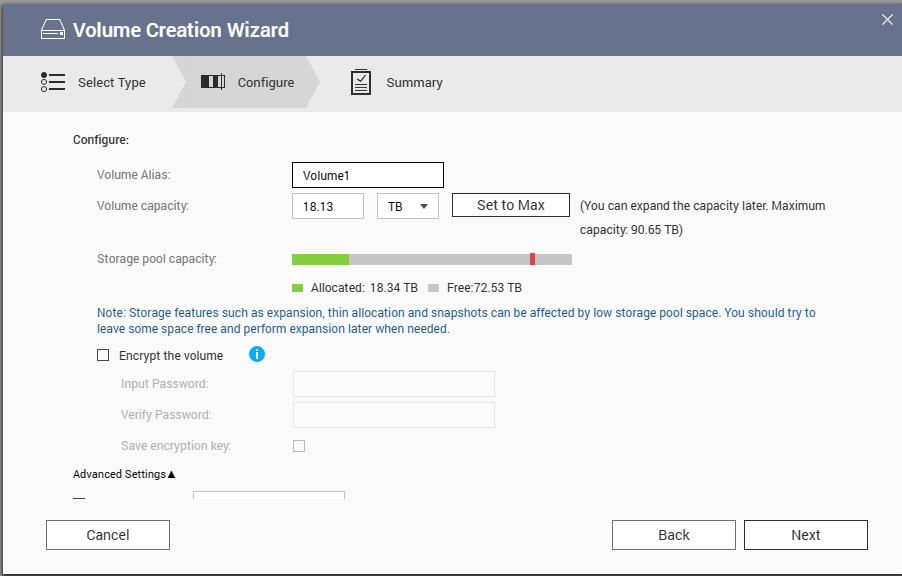
The next major step in the setup process is to create one or more volumes on the storage pool.
Configuring Block Storage
So, what about configuring the NAS to act as block storage? Again, it comes down to your vendor and how you plan to use the storage. Even so, I will show you how I configured block storage on one of my NAS appliances.
In my environment, I connect directly from a server to a NAS over a dedicated 10 Gbe connection. I enabled communications between the server and the NAS by using iSCSI.
To make this happen, the first thing that I had to do was assign static IP addresses to the 10 Gbe adapters within both the server and the NAS. The addresses needed to exist within a common subnet. As this link is exclusively for communication between the server and the storage device, DNS configuration wasn’t necessary.
With the IP addresses configured, the next step was to start the iSCSI service on the NAS and then create an iSCSI target, as shown in Figure 3.
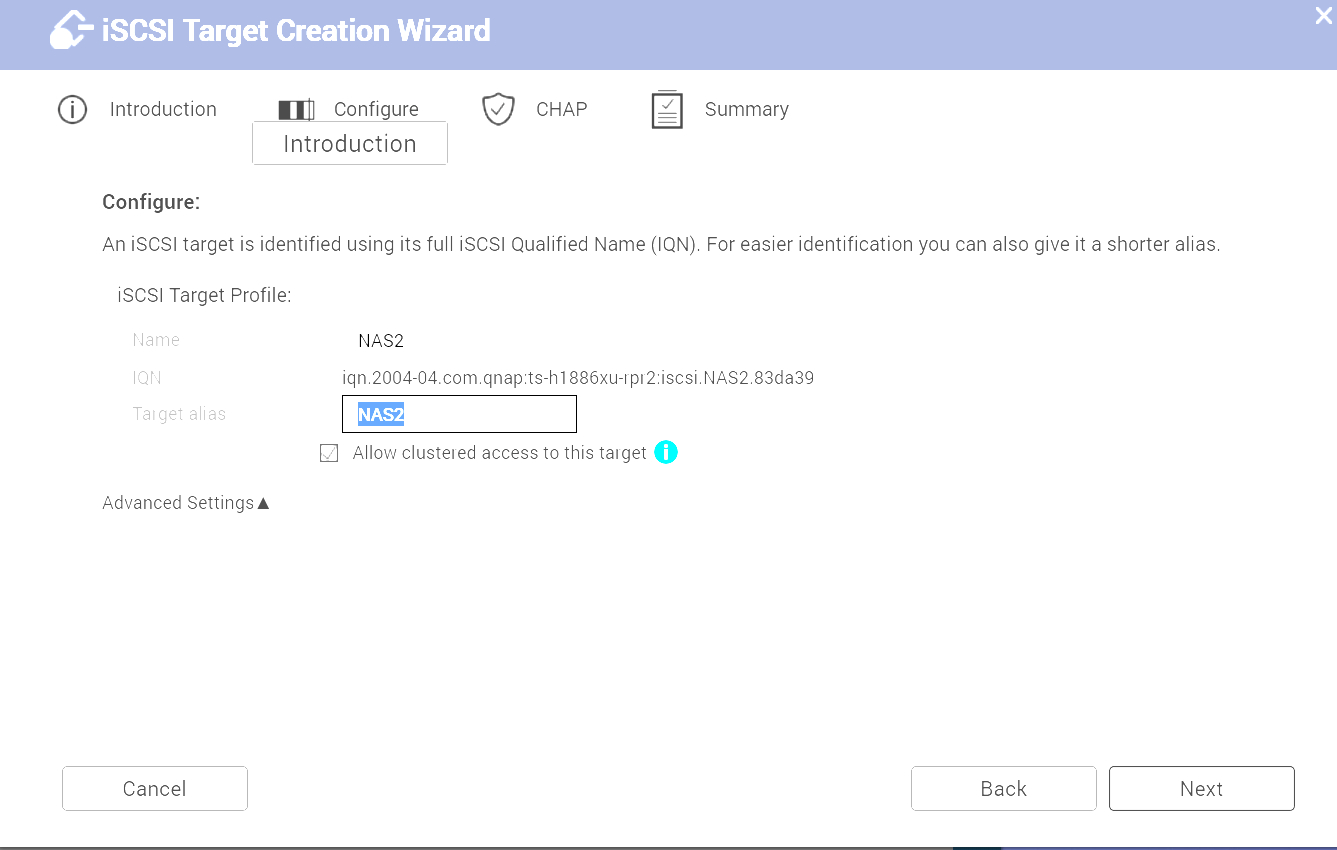
I have created an iSCSI target on the NAS.
Next, I proceeded to create a block-based LUN. Since it was block-based, I only needed to designate the storage pool that would contain the LUN, as shown in Figure 4, and later specify the LUN’s size. Alternatively, I could have opted for a file-based LUN, which would have required me to create a volume and then attach the LUN to it.
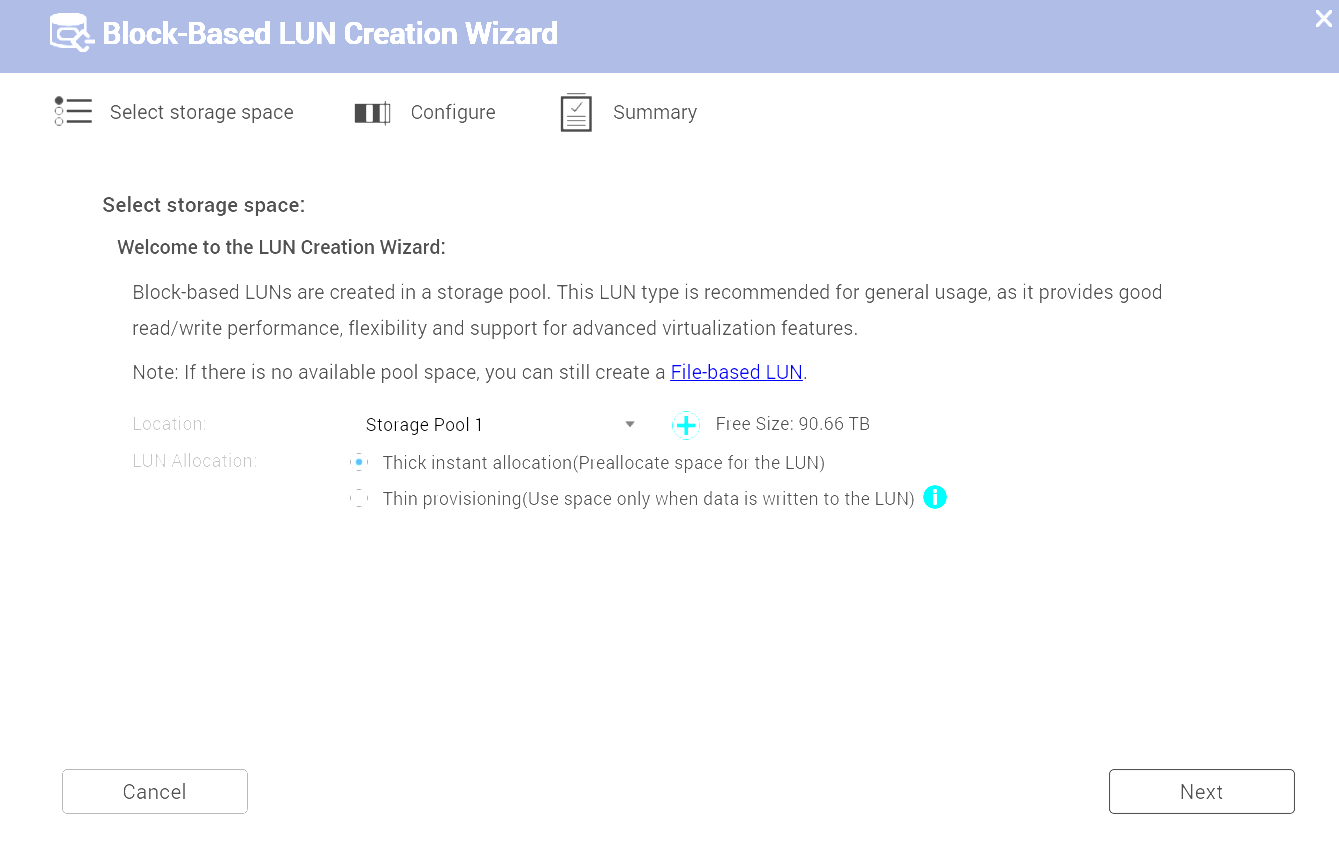
A block-based LUN can be created directly on the storage pool.
It’s worth noting that when you create a LUN, it typically is not automatically mapped to an iSCSI target. Therefore, you will usually need to specifically tell the NAS to map the LUN to the target, as shown in Figure 5.
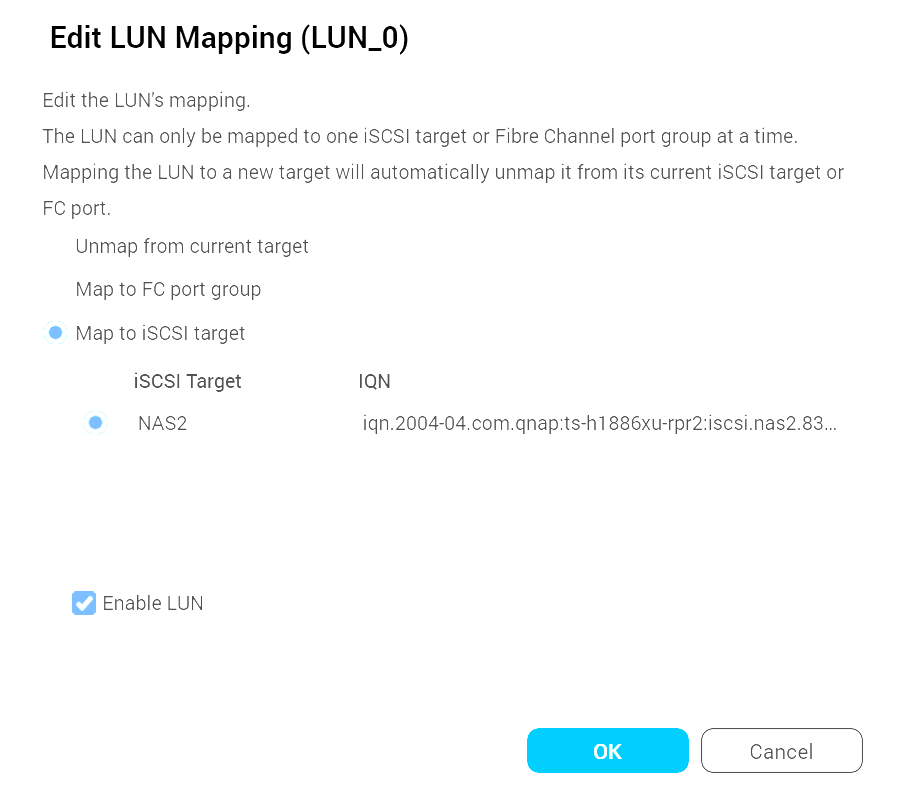
The LUN needs to be mapped to a target.
The final step is to prepare the target for data storage. In my case, this meant using the Windows Server iSCSI Initiator to connect to the iSCSI target. From there, I used the Windows Disk Management console to initialize the storage and create the necessary storage volumes. Figure 6 shows how the raw storage is initially exposed through the Disk Management console.
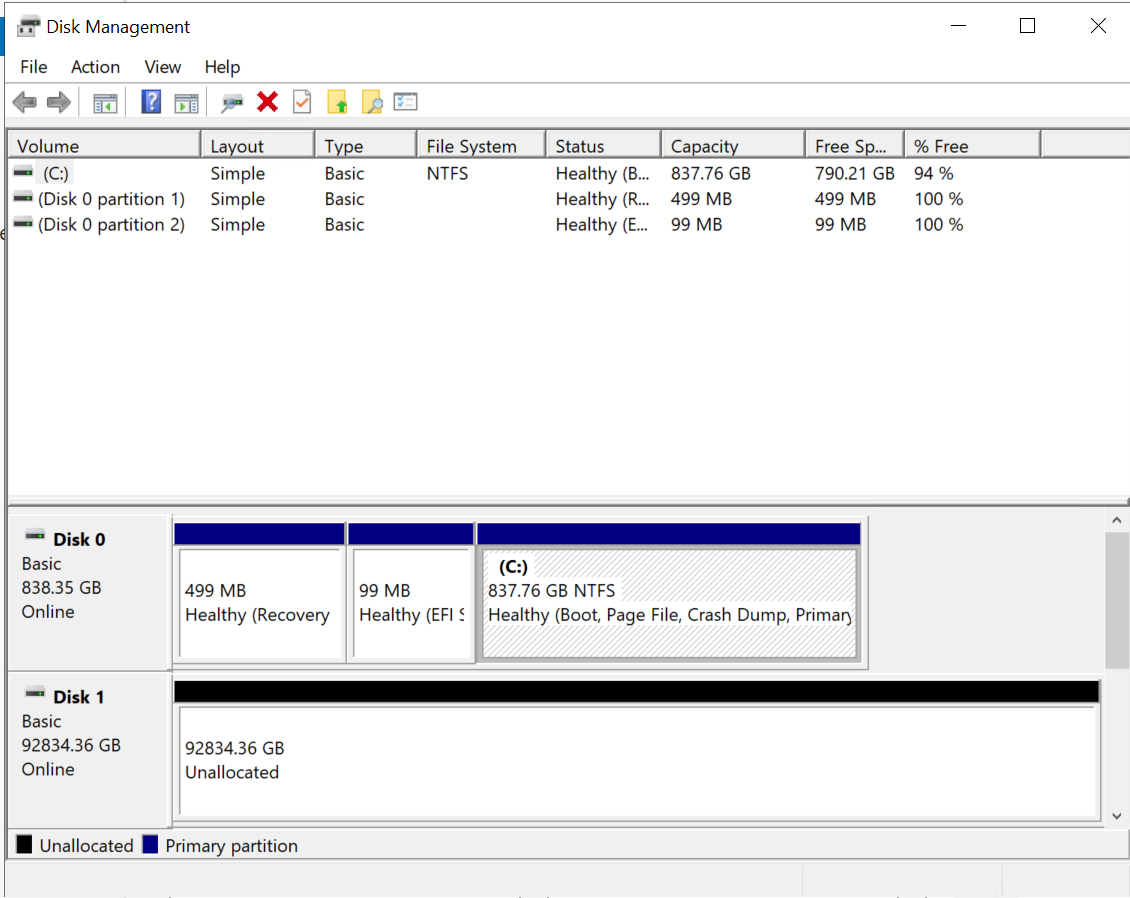
The Disk Management console displays the unallocated space associated with the newly created LUN.
About the author
 Brien Posey is a bestselling technology author, speaker, and 21x Microsoft MVP. In addition to his ongoing work in IT, Posey has trained as a commercial astronaut candidate in preparation to fly on a mission to study polar mesospheric clouds from space.


