| Downloads |
|---|
| 143640.zip |
RELATED: "How to Build Windows 8 Applications" and "How to Work with Local Notifications in Windows 8-Style Apps."
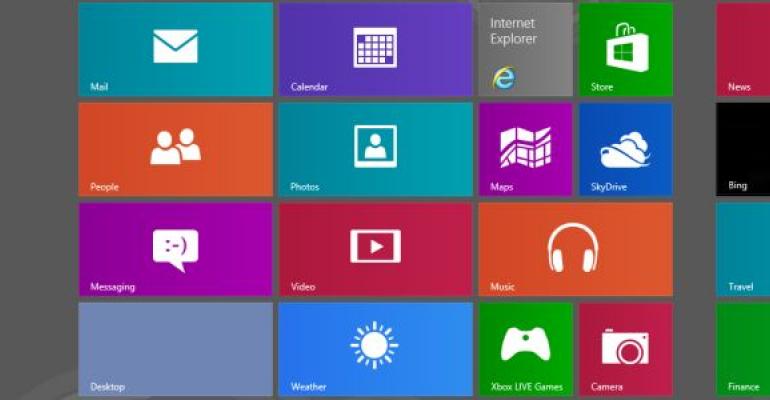
Windows 8's new Start screen and user experience has been the topic of many a tech conversation this year, as developers delve into building applications for the new Windows platform. As you begin to get your head around building Windows Store applications (formerly known as "Metro-style" apps), an important feature not to overlook is live tiles -- a significant evolution away from the standard UI design practice of representing an application using a static icon image. The Windows 8 Start screen presents each application as a tile. Although an application's tile is initially a static image, Windows 8 exposes an API that lets you provide users with relevant, frequently updated information about your application via the tile. Using this API, you can make your application's tile live using a combination of text and imagery that will keep the user informed and engaged with your application.
You might wonder why you need to implement live tiles in your application. The purpose of live tiles is to provide the user with "information snacking." By providing small pieces of information from your application, you can update the user without having to actually run the application itself. As an example, consider an email application. A tile that displays the number of new email messages lets the user get updated email information from a quick glance at the tile, saving the user the trouble of opening the email application. Tiles can be used similarly in a range of applications -- from social media to gaming to line-of-business apps.
Join me now as we explore Windows 8's live tiles and walk through examples of how to work with them. Note that this article was written on the Windows 8 Release Preview; the information covered herein is subject to change when the final version of Windows 8 is released.
Anatomy of a Windows 8 Tile
Live tiles come in two sizes: square and wide (150 x 150 pixels and 310 x 150 pixels, respectively). A wide tile encompasses the same screen real estate as two square tiles. Therefore, the extra 10 pixels in the width are there to cover the spacing between two square tiles sitting next to each other. Each application is required to provide a square tile logo. This static image will be the default tile for your application unless an active live tile replaces it. The wide tile logo is optional. If a wide logo isn't supplied, the user will have only the option to show the tile in the square format. Even if you provide both logos, the user is in control of how the tile is supplied. Therefore, when implementing live tiles, you need to create one for both sizes if you want to support both.
In addition to holding the tile's content, a live tile (and a static tile, too) can contain two additional pieces of information. The bottom left corner can contain your application's branding: either a small logo or a short name. The bottom right corner can display a small badge. Badges are set using an additional API; a discussion of them is beyond the scope of this article. It's important to keep these features in mind when you're determining tile layouts and images to use so that you don't lose information behind the branding or badges.
Defining a Live Tile
There are three different types of live tiles: text-only, image-only, and a combination of text and images. For the text-only and image-only formats, the tiles are considered to be static and contain only a single view. Tiles containing a combination of images and text can either have a static view or animate between two views in a peek tile. Peek tiles show a collection of images; the tile's content will "slide up" to show additional content below it. Regardless of the layout that you decide to use, each live tile is defined and implemented the same way.
To create a live tile, you use a predefined XML template. These templates are provided in the Windows 8 SDK and are non-extensible. Creating a custom template isn't an option; however, the SDK provides a large collection of templates for you to choose from. As of the Windows 8 Release Preview, there are a total of 46 tile templates, with 10 of those defining square tile templates. For more information about templates and downloads, see the Windows Store Apps section in the Windows Dev Center.
Each tile template follows the same XML scheme. It contains all the nodes allowed by that template; modifying the structure results in an error message.
Listing 1 shows an example of a wide live tile that contains both images and text.
Listing 1: XML for a Wide Live Tile that Contains Images and Text
      Text Header Field 1
      Text Field 2
For each
Hello, Live Tile
Before diving into creating live tiles, the first thing you need to look at is how to define the static tile. In Visual Studio 2012, create a new Windows
Metro–style application using the Blank App (XAML) template in C#. There are two areas of interest in the Solution Explorer to look at first. The first is
the Assets folder that's created, which contains a group of default images. Logo.png is a 150 x 150–pixel image that's used for the default square tile.
The image that's used for the application's tile is defined in the application manifest. Open the application manifest by double-clicking the
package.appmanifest file located in the project's root directory. The Application UI tab contains a Tile section that lets you define the default tile
settings, as shown in Figure 1.

Figure 1: Defining Default Tile Settings
For our purposes in this article, the only two items you need to familiarize yourself with are Logo and Wide logo. You'll notice that the Wide logo property is blank by default. In order for your application to support wide tiles, you have to add a valid 310 x 150–pixel image to your project; enter the image's path in the Wide logo text area. The other options in this section are for you to define the branding of the tile, including the branding logo or name that appears on the bottom left corner of the tile.
To see the default tile in action, run your application in the debugger (F5 is the shortcut for this). After your application loads, return to the Start
screen, and you'll see that a new tile was added for your application. The tile should appear similar to the image shown in Figure 2.
Figure 2: Default Tile Example
Although this isn't a
very inspiring tile, it does work as a placeholder, letting you create your base tile and avoid the need to generate an image, so that you can build the
application. However, until you create a live tile, the default tile is what your users will see, so it's worth your time to make the default tile look a
bit more appealing than a big white X on a black background.
Creating a Live Tile
Now that you know how the default tile is defined within the application, it's time to look at how your application can update the tile. The UI for the
example is a simple form that you'll implement throughout this article. Figure 3 shows the final UI, and Listing 2 shows the full XAML for the page.

Figure 3: Tile Application UI
Listing 2: XAML for the Tile Page
x:Class="TileExample.MainPage" IsTabStop="false" xmlns="http://schemas.microsoft.com/winfx/2006/xaml/presentation" xmlns:x="http://schemas.microsoft.com/winfx/2006/xaml" xmlns:local="using:TileExample" xmlns:d="http://schemas.microsoft.com/expression/blend/2008" xmlns:mc="http://schemas.openxmlformats.org/markup-compatibility/2006" mc:Ignorable="d"> Tile Sample Text 1: Text 2: Tag : Enable Queueing: Expire in 5 min:
Listing 3 shows the complete C# code for all the examples in this article.
Listing 3: C# Code for Tile Application
private void btnTile_Click(object sender, RoutedEventArgs e)
{
    var tileContent = TileUpdateManager.GetTemplateContent(TileTemplateType.TileSquareBlock);

    var tileLines = tileContent.SelectNodes("tile/visual/binding/text");
    tileLines[0].InnerText = txtLine1.Text;
    tileLines[1].InnerText = txtLine2.Text;

    var notification = new TileNotification(tileContent);

    if (!String.IsNullOrEmpty(txtTag.Text))
    {
        notification.Tag = txtTag.Text;
    }

    var updater = TileUpdateManager.CreateTileUpdaterForApplication();

    updater.EnableNotificationQueue(cbQueue.IsChecked.Value);

    if (cbExpire.IsChecked.Value)
    {
        notification.ExpirationTime = DateTime.Now.AddMinutes(5);
    }
    updater.Update(notification);


}

private void btnClear_Click(object sender, RoutedEventArgs e)
{
    var updater = TileUpdateManager.CreateTileUpdaterForApplication();
    updater.Clear();
}
Interaction with the tile API is handled through the TileUpdateManager class. TileUpdateManager and the rest of the tile API are located in the Windows.UI.Notifications namespace. The first step in creating a live tile for your application begins with retrieving a valid tile template. The btnTile_Click event handler is where you'll generate the live tiles. The API provides a method for retrieving any of the supported templates through the TileUpdateManager.GetTemplateContent() method, by passing in an enumerator TileTemplateType, as shown in the following example:
var tileContent = TileUpdateManager.GetTemplateContent(TileTemplateType.TileSquareBlock);
The method will return an XML document containing XML code that represents the template. It's important to note that it isn't necessary to use the API to retrieve the XML content. The content can be generated from any source as long as its schema is correct.
After the template has been retrieved, you can modify the nodes to populate the live tile with relevant information. Our example here uses the TileSquareBlock tile, which contains two text nodes. Populate the InnerText of the two text nodes with the contents of the first two TextBlocks in our UI, txtLine1 and txtLine2:
var tileLines = tileContent.SelectNodes("tile/visual/binding/text");
tileLines[0].InnerText = txtLine1.Text;
tileLines[1].InnerText = txtLine2.Text;
With the updated XML document completed, you can create a new TileNotification object by passing in the modified XML document into the constructor:
var notification = new TileNotification(tileContent);
The final step is to create a TileUpdater for your application. This is accomplished by using the CreateTileUpdaterForApplication() method of the TileUpdateManager. Calling the TileUpdater's Update() method with the new TileNotification will update your application's live tile:
var updater = TileUpdateManager.CreateTileUpdaterForApplication();
updater.Update(notification);
If you haven't already done so, you'll need to create an empty event handle for btnClear_Click before you run the application. After this has been created, the application should successfully compile and run. Before you try to create a live tile, take a moment and return to the Start screen. The application will add a tile to the Start screen the first time the app is run in the debugger. The tile should have the default look of a white box and X on a black background. Returning to your application, on the form fill in some text for Text 1 and Text 2, then click the Submit Tile button. One more trip to the Start screen, and you'll see that your application's tile has been updated with the live tile that you just created.
Making the Most of Your Tiles
Now that you've created a live tile, the fun doesn't stop there. There are a few features that are worth knowing about so that you can fully take advantage of live tiles. The most important of these features is notification queuing. Updating your application's live tile can be a very effective way to communicate with the user, but what happens when you have more than one thing to communicate? The tile API allows an application's tile to have up to five live tiles at any one time. The Start screen will automatically rotate through the available tiles.
Typically, tiles are added in the order that they're received. Once five tiles have been received, the oldest one will be replaced with the next tile. The
TileUpdater class exposes a method to enable or disable queuing. By default, notification queuing is disabled. The following line will enable queuing based
on the IsChecked property of the cbQueue CheckBox and should be added to your application immediately following the code that creates the updater object:
updater.EnableNotificationQueue(cbQueue.IsChecked.Value);
Now run your application again and add a new tile with the Enable Queuing option selected. Your application's tile will now have two tiles that will be
rotated through.
One thing to consider when using live tiles is that you want the tile to show only relevant information. For instance, if your application pushes event reminders as live tiles, you wouldn't want the reminders to still show on the tile after the event is over. Imagine a user's disappointment when she gets excited about her favorite band coming to town only to find out that the concert was the night before. Luckily for your concert-going user, the tile API has a couple of features that will help to prevent such a tragedy from occurring.
The first option you have is to set an expiration time on the TileNotification by setting the ExpirationTime property. When this property is set, the tile
will be removed when the expiration time is reached. If queuing is enabled, the tile will simply be removed from the rotation. If queuing isn't enabled or
if there's only a single tile in the queue, the tile will revert back to the default tile. You can test this by adding code to check for the value of the
cbExpire CheckBox. The following code will expire the tile five minutes after it's created:
if (cbExpire.IsChecked.Value)
{
notification.ExpirationTime = DateTime.Now.AddMinutes(5);
}
An additional update option is to set a Tag for the TileNotification. By identifying a Tag value, you can update that specific tile from the queue. For instance, if you set the Tag value to "Concert", the next time you submit a TileNotification with that same Tag, the updated tile will replace the original tile. The following code will add the txtTag.Text value to the TileNotification when it's created. The TileNotification will produce a runtime error if you set the Tag property to an empty string, so it's important to test the value. If you enable queuing, you'll see that using the same tag will replace the previous tile instead of adding a new one to the rotation.
if (!String.IsNullOrEmpty(txtTag.Text))
{
notification.Tag = txtTag.Text;
}
One last option you have for removing a live tile is to remove all the live tiles for your application. The API currently doesn't support removing a specific tile -- therefore, it's an all-or-nothing approach. Removing the tiles from your application is as simple as calling the Clear() method from the TileUpdater class. By wiring the btnClear_Click event using the following code, you'll be able to clear all the live tiles by clicking the Clear Tiles button. Your application will return to the default tile that's defined in the package manifest.
private void btnClear_Click(object sender, RoutedEventArgs e)
{
var updater = TileUpdateManager.CreateTileUpdaterForApplication();
updater.Clear();
}
Mechanisms for Updating Your Tiles
This article demonstrates how to update your application's tile directly from the application. However, there are times when this isn't the optimal solution. For instance, you might want a mail application to display the number of new email messages. If you're only updating the tile from within the application and it isn't currently running, it won't be able to update the tile. Fortunately, there are several approaches that you can take to get around this problem. Although this article won't dive into these approaches in detail, they're worth knowing about.
The first option at your disposal is to create a scheduled tile update to post at a future date and time. The tile API exposes a ScheduledTileNotification class that's nearly identical to the TileNotification class described earlier -- except for the addition of a DeliveryTime property. The TileUpdater class has an AddToSchedule() method that will let you add the notification to be posted at the DeliveryTime. In addition, you can review and remove scheduled notifications through the GetScheduledTileNotifications() and RemoveFromSchedule() methods of the TileUpdater.
With Metro you have two options for updating tiles remotely. The TileUpdater has a StartPeriodicUpdate() method that lets you define a URI to query and a frequency in which to query the URI. The URI must return a correctly formatted XML template. This polling approach lets your tile present relevant information to the user even if the user hasn't run your application for an extended period of time.
A similar approach is to use the Windows Push Notification Service (WNS) to push updates to your users' machines. The WNS lets your application subscribe to a remote service. When the service sends updates to the WNS, they're sent to all subscribers. A major benefit of this approach is that it lets you deliver notifications whenever necessary, making them timely and removing the need and overhead of constant polling.
Wrapping Up
The Windows 8 Start screen brings a unique opportunity to application developers. It lets you present timely and useful information to users without requiring users to open your application. This not only keeps users informed but also acts as a reminder about your application and can help promote frequent usage. If you're interested in learning more about the live tiles API beyond what I've covered here, refer to the documentation in the Windows Dev Center.
Tony Champion is a Silverlight MVP and owner of Champion DS, creating custom solutions on Microsoft platforms. He is currently authoring his first book on Windows 8 and is an active speaker and blogger.
- Email: [email protected]
- Twitter: @tonychampion
- LinkedIn: http://www.linkedin.com/in/championt
- Blog: http://tonychampion.net


